
I have been experimenting with breads and pizza doughs for the last decade and one of my favourites is Focaccia. Still warm, freshly made focaccia is a life-affirming thing.
My 'make on the day' go-to is pretty much this recipe from Vito Locapelli. I've linked to his recipe as the key advantage of video is that it gives you much more visual reference to texture and consistency. I find most recipe writing interminably frustrating for the lack of adequately descriptive language. You can overwork dough and hydration varies based on flour so it's important to know what you're aiming for, particularly for a new recipe where you might not have a reference point.
I have several variants which I have evolved from Italian chefs which are more elaborate and require substantially greater time commitment or ingredients to make but this recipe is for a 'focaccia di casa'. If you are interested in something more complex - Italia Squisita is one of my favourite resources and it's difficult to surpass for authenticity (subtitled in English if you don't speak Italian).
Francisco Migoya and Nathan Myhrvold of Modernist Bread and Modernist Pizza fame take a far more scientific approach if you're more interested in the science or 'why'. For example, they add soy lecithin to enrich the dough with a higher fat percentage because the emulsification properties of lecithin ensure that the fat is thoroughly dispersed. The Modernist books are works of obsession and science being superb tomes to understand the what, how and why.
My variation below doubles the proportion of yeast and foregoes a poolish / levain. Since there is no preferment stage to develop leavening energy after the poolish has been fed, this focaccia can be baked from start to finish on the same day. The only downside is that some of the flavour complexity gained from preferment is lost. If you're using the focaccia for filled sandwiches, it'll be less noticeable.
Supplies
As with most recipes that rely on few ingredients, the quality of ingredients make all the difference. I probably use more expensive ingredients than is necessary but I'm not running a margin-sensitive bakery or restaurant, so these trade-offs at the scale I'm working at matter not. I've listed my preferences as part of the ingredient list.
I use a Brod & Taylor bread proving box which ensures predictability when it comes to timings and is generally useful for all types of breads and ferments. The price is inequitous relative to the materials and build quality though. It's a shame that there isn't a better value consumer product considered that you can buy an entire professional stainless steel commercial proofing cabinet for the price of two of these plastic boxes.
In terms of bakeware, there are a plethora of choices, but I like Marcato classic blue iron squared pans which come in two sizes (30x23cm, 40x30cm). They're far more reasonably priced. Netherton Foundry also produce a focaccia pan in 2mm spun steel which is also a fine choice but considerably more expensive. The handles make retrieval from an oven a little easier and it can serve multiple purposes despite being billed as a specialist item.
Ingredients
320ml water (tepid so around 22-25 degrees)
3 grams Dry Yeast [Caputo Italian Lievito Secco Instant Dry Yeast]
5 grams Honey [Number Eighteen Suffolk Wildflower Runny Honey]
400 grams 00 Flour [Matthews Cotswold Pizza Flour '00']
10 grams salt [Maldon or Blackthorn]
Olive Oil [Honest Toil or Murat da Cata (Mr Olive Oil)]
Method
I've split the method into key parts to help with planning timings. Most recipe writers are inaccurate when it comes to effort estimations in recipes but mine are accurate and don't make the assumption that you have a brigade doing your prep either.
Before you start, ensure you have a reasonably large mixing bowl to allow space to work with the dough. Mixing is done within the bowl so you'll need capacity beyond the ingredient volume.
If you are working with a different type of flour i.e. not 00, check the W value which is a European measure of flour strength - it determines how elastic and resistant dough is during fermentation and is an indicator of gluten strength, water absorption and gas retention. Strong flour in the W280-350 range is most suited to pizza and foccacia.
Part 1 - Blend Ingredients [15m] → First Prove [30m]
- In a mixing bowl, pour in roughly half of the water and add the dry yeast. It will bloom, stir it and melt into the water using a mixing spoon. Combining should only take a couple of minutes.
- Add the honey, it's about a teaspoon. Combine.
- Add the flour gradually to allow absorption, the mixture will be very dry and scrappy at this point.
- Add the sea salt. I tend to use a pestle and mortar to ensure it's ultra fine even though my grinder can achieve the same result. Twisting out 10g from a grinder is a lot more laborious. Fine salt ensures even distribution through the dough mix. Only use flakes on the top.
- The water should have absorbed fully and the salt should be distributed and turned through the mixture at this point. Add the remaining water.
- Using the mixing spoon, turn and fold the mixture until fully combined. The texture of the dough may vary based on the W-value of the flour and will be much stickier with a lower W-value. You may need to add a small amount of additional water to help it combine, but less really is more, so add a few drops and then mix, judging by eye whether you need more once the additional water has been absorbed.
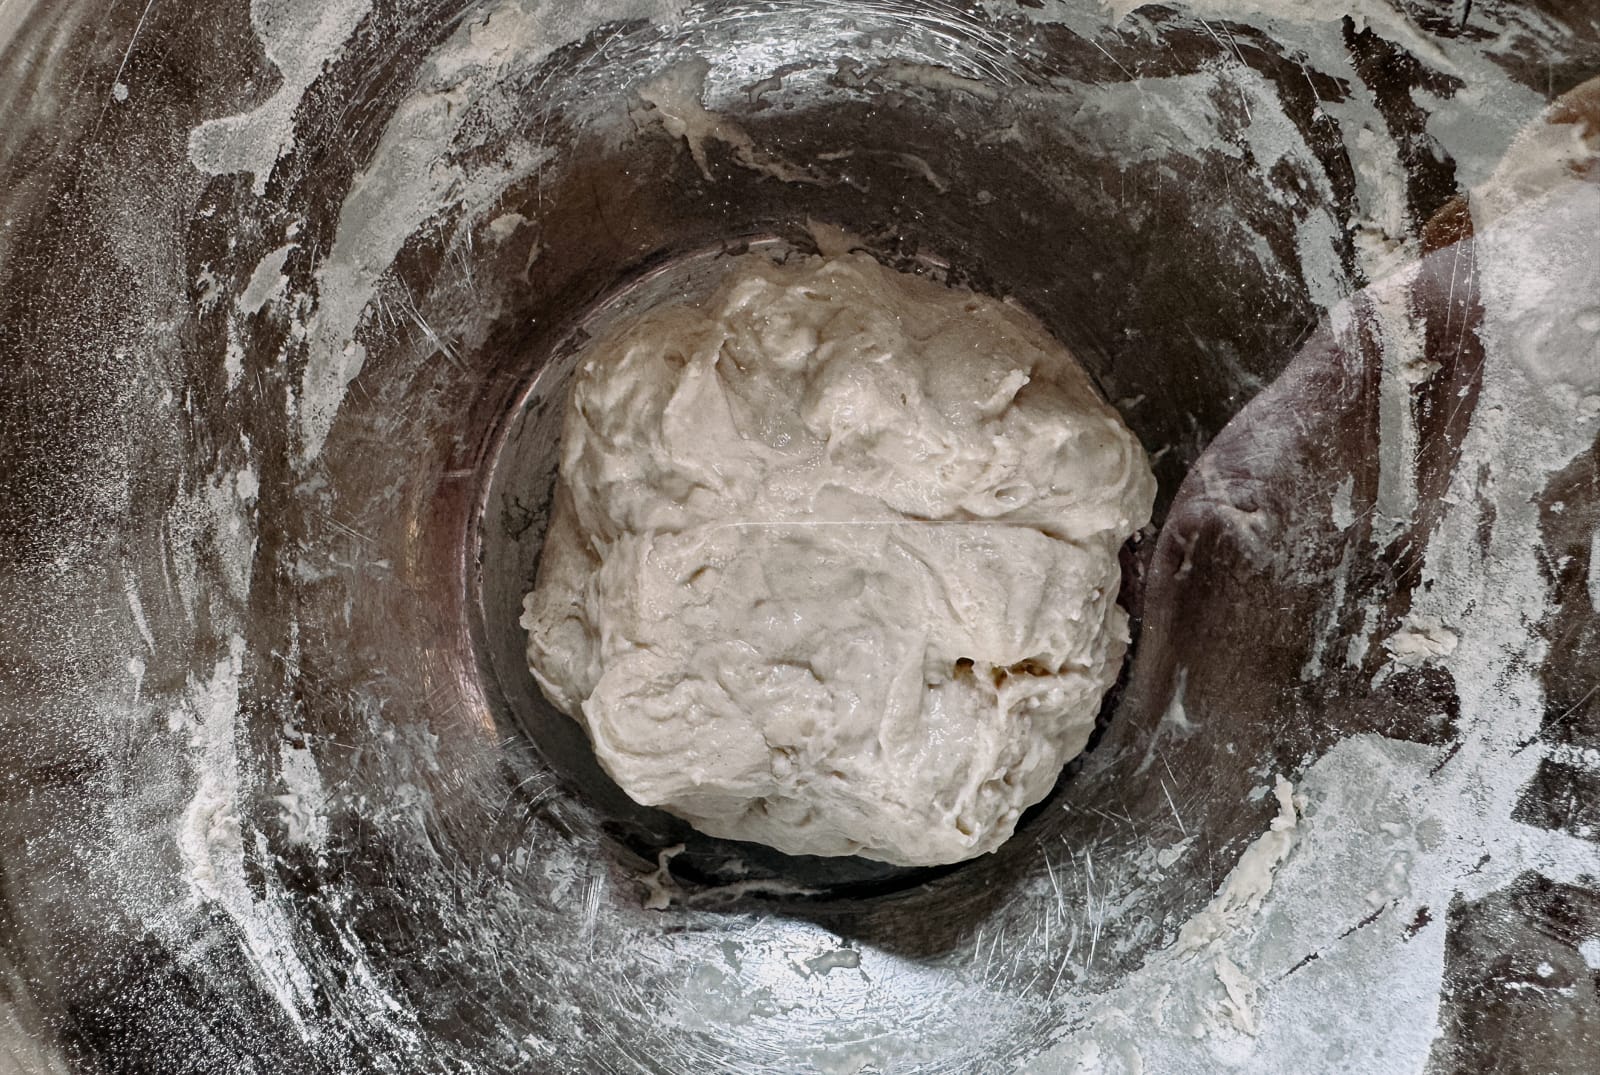
- After 3-5 minutes, the mixture should be combined and have a rough, porridge like texture. You should be able to lift the entirety of the mixture with a spoon and the sides should be free of dough. At this point, cover the bowl with plastic wrap or cling film. Place in a warm area (room temperature) to rest for 30m. If you have a proving box, set it to 23 degrees Celsius.
If you want to see how much the dough has expanded, it's helpful to take a baseline photograph (see below) to chart progress. If it has barely enlarged, check your ambient temperature and allow additional time.
Part 2 - Fold [10m] → Second Prove [60m]
- Retrieve the bowl and remove the wrap, do not discard the wrap as you will need to cover the bowl again. The dough should have doubled or nearly doubled in size but lower temperatures take longer.
- Using the spoon, insert it under the dough and fold the bottom to the mirror position on the top. Preserve the centre mass of the dough, you will only work the outer 20-30% of the dough. Rotate around the dough at 10-20 degree intervals with the spoon and let the shape of the bowl guide the spoon. You can rotate the bowl to get better leverage as you do this. You want to ensure that the dough is detached from the bowl. The dough should be substantially folded in on itself and will look much smoother at this stage. Repeat this 'bottom to top' motion for a couple of full rotations of the bowl to build the gluten.
- Cover with the plastic wrap and leave to prove for an hour at room temperature (20-24 degrees Celsius). After an hour, it should have doubled in volume.
Part 3 - Fold [10m] → Final Prove [30-40m]
- Oil your hands with olive oil so they are evenly coated but not exessively so that it drips off your hands. If you have an excess, use it to wipe around the bowl per the next step.
- Wipe the entirety of the bowl above the dough by hand with olive oil, just enough to prevent sticking but again, not excessively so that it pools at the contact point where the dough touches the wall of the bowl.
- Using your finger tips, gently break the dough away from the wall of the bowl, working your fingers underneath the dough towards the centre of the dough mass. Take care to only disturb the edges and not the main body of the dough. Repeat until you have worked around the circumference of the bowl and detached the dough from the bowl edge.
- With the edges now released, put both hands in the bowl under the dough and lift the mass of the dough from the central point of the bowl. The dough should lift away and start to sag under its own weight where it isn't supported by your hands.
- Gently put the dough down in the bowl, rotate the bowl by 15 degrees and lift the dough in the same manner again. Repeat this process until the surface tension has started to smooth the dough and it doesn't sag under its own weight. Then using your fingers, pull the sides under the ball and tuck the seam into the underside. Repeat this until the top is smooth. With the last tuck you make, ensure the seam is neat and as closed as possible.
- Using extra virgin olive oil, pour a liberal quantity into the focaccia pan ensuring it is evenly distributed across both bottom and sides.
- Place the dough ball into the centre of the pan. Cover liberally with olive oil and ensure it is evenly distributed across both top and sides as you want to ensure that in its final rise, it doesn't stick to the plastic wrap.
- Cover with the plastic wrap and ensure the wrap is loosely tucked to the edge of the dough. Leave for approximately 30-40 mins (depending on room temperature). The dough will significantly expand in size on this final rest.
Part 4 - Final Prep [15m] → Baking [15m]
- Turn the oven on to 230 degrees celcius and let it heat soak. The temperature probe in your oven will measure the ambient not radiant temperature so allowing the oven to heat soak and stabilise temperatures is important.
- Check the dough has doubled in size and remove the plastic wrap. The dough should feel airy and soft to the touch.
- Drizzle olive oil over the top of the dough in a hashed pattern and oil your hands. Put your hands under the dough gently and check that it is not attached to the pan base and then gently stretch the dough out toward the edges of the pan. Try to work from the edges and gently ease and lift it - the dough is elastic and this needs to be done delicately to avoid knocking the air out.
- When formed, use your fingertips to indent the dough, this process will force air pockets out and the dough will bubble as you stipple the surface. Gently ease the dough out toward the edge of the pan as you do this to fill the container.
- Distribute some sea salt flakes evenly across the surface of the dough. There are 10 grams of salt in the dough so how much you add to the top of the dough will be to personal taste. Then distribute fresh cut Rosemary leaves evenly across the surface.
- Drizzle some more olive oil on the top and place the focaccia in the oven for 15-20m until the top is golden.


